I remember the days of setting up a couple of light boxes or umbrellas along with the use of a light meter and an array of equipment to capture really nice portraits. Worse yet, you needed a decent ceiling height to get good images and a lot of room to set the equipment up for different "moods". We still can do that today, but for the average dentist who simply doesn't have the budget or room to create a true studio, I introduce the Stellar Diva 18 inch CFL ring light.
 |
| The 18" CFL bulb is bright but very cool and comfortable to be near. |
What is it, you ask? It's a simplified way to take portraits. The concept is this: Set the light (less than $200) on a tripod or stable base, attach your camera on a flexible stalk (included) and you have perfect lighting. No softlights, no heat, no extra room (or budget) needed. Seriously. Just set it up, seat your subject in front and shoot.
Well, I took it over to a friend's office today to show it to him and we started shooting images. I chose to do things a little differently than they suggest and shot using an old Nikkor 70-300 lens from above , rather than attach the camera to the stalk. You don't need to do this, but I've always enjoyed thinking "outside the box", plus, I love the blurred background I can get using both a low f-stop and the zoom. I guess it's just my style.
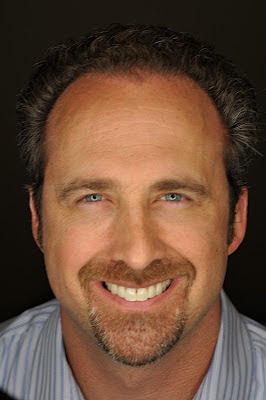
Below are a few images and as anyone there can attest, once I set it up, it took literally less than 5 minutes to shoot all of the images you see below. Are they as good as a $2000 setup with 3 lights? You be the judge, but remember, how good is good enough? With this system, I don't need extra room, it can be set up in the operatory in literally 1 minute and I'd feel fine putting these images up on my wall any day.
Remember, other than slight histogram adjustment and maybe a tiny bit of sharpening, there were no other changes to these images. There was no makeup or hairstyling and I just wanted to see what things would look like in an "average" setting. Scroll to the end of the 5th image and you'll see one more capability of this equipment...
 |
| Do you know how hard it is to make your 12 year old daughter smile for dental portraits?!?!? |
So, using the light on an angle to the smile, I wanted to see what things could look like without diffusers or bounce. Just the ring light and an oblique angle. I had never tried this before, but the possibilities are endless.
 |
| This is just the ring light and my camera and nothing else. |
 |
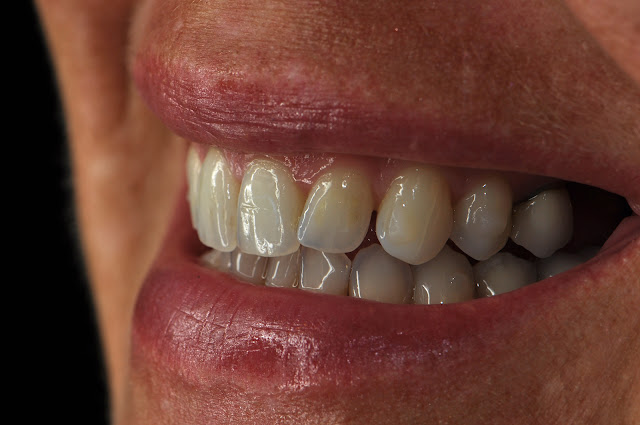
| Just having fun with an "artsy" anterior shot, but it can do so, so much more. |
Only one piece of equipment, for less than $200 to get great portraits and up close shots? I'll be using this a whole lot more...


I love the facial ilumination is wonderful, is a pitty the ring on the eyes!
ReplyDeleteThat's a great point, but that's why they make vanilla and chocolate. I personally love the ring in the eyes. It adds a sparkle and most are not looking at it. Would you rather have two big rectangles in the eyes from 2 soft lights instead of the ring? It's all personal preference. Plush, you can easily photoshop it out if you don;t like it, right?
DeleteThanks for the comment
This comment has been removed by the author.
ReplyDeleteGreat picture! What lense and settings did You use?
ReplyDeleteJust use your regular dental lens, turn off your on camera flash and adjust your f-stop until your histogram is perfect. It really is THAT easy.
DeleteGlenn YOU are an awesome dental photographer, I own all the stuff you sell and have never been good at (able) getting good photos intra orally. SO... I broke down and got the correct system for my Nikon D90 and for a D3200. NOW.. I hope it will work. B&H has the 85mm macro with a 35mm prime 1.8 lens as a kit ($500).
ReplyDeleteMy real comment here
1. is that the B&H guys suggested I go with the Bolt VM 160 ring light ($110), really flat and over lit pictures- and I was going to return it when I used it for a portrait and it provides the picture versatility of the 18" ring while being way more portable. So now I am going to mount my 35mm portrait lens with the Bolt on my 3200 and the 85mm prime macro on the D90 with the R1 flash and see how it all turns out. I also have an extensive Sony system. They are such innovators with cameras how come no one uses them?
2.Have you used Bill Moore Dental Photography. Your DVDs are a better deal but can you look into getting a cheat sheet like he has for folks like me who have bought your entire system?