Facebook

Wednesday, May 21, 2014

A Review of the EyeSpecial C-II Dental Camera by Shofu

The new EyeSpecial C-II is a bold step in the right direction by Shofu, but the cost may be prohibitive.
I'm always looking for new, cool gizmos and gadgets to help clinicians get better dental images, so when I recently opened a dental magazine and saw a picture of the new Shofu EyeSpecial C-II by Shofu, and what it promised, I became very excited. I made sure that at my attendance at the American Association of Orthodontists meeting in New Orleans I would check out the camera.


I went to the Shofu booth and was allowed to handle and play around with the camera and I have to say, it delivers on everything it promises. It's light, easy to clean, easy to handle, gives more than adequate images and its program modes make most of the standard shots really easy. In short, a great camera. I could go on and on about how much I liked it and why I think it's a great camera, but then they told me about the suggested retail price and the love affair abruptly ended. They want $2795 for the camera. Yep, nearly $3000. Now, I'm not one to usually complain about price, but in my humble opinion, that's an almost obscene price to charge for a glorified point and shoot.


Sure, it has some great programming modes and it does things that I haven't seen any other point and shoot do, but spending $3000 on this camera, to me, just seemed about 2-3 times too much.

I tried to explain to the Shofu representative that at that price point, nobody is going to want to buy the camera. I tried to explain that the camera was far more expensive (yes, FAR more expensive) than a Nikon D7100, a Nikkor 85mm Micro lens and a wireless R1 flash, which gives far better pictures and is way more versatile. For users who want a simple camera to use, I couldn't find one reason to recommend this camera when you could buy a myriad of dental point and shoots for literally 1/4 the price.

I've dealt with thousands of dentists who've had questions about cameras. There are basically two types of dental photographers. Those who want to approach dentistry like artists and get the absolute best image they can and they would NEVER want to use this camera due to the lack of versatility (i.e.-different lenses, flash positions, etc). Then there are those who just want dental images. Nothing amazing, just simple documentation and that's it. Why would they drop $2795 on a camera? They wouldn't.

So, the EyeSpecial C-II is a great example of a fine product that simply costs too much. If the price ever gets cut in half, run out and get one, but until then, there are way better options for the money.

As a final example to drive home my point, I asked Shofu how they ever expected to sell this camera at their asking price. I literally implored the representative to better understand that there was no way this camera was ever going to sell a ton of units at that price. Though defensive, she proudly exclaimed that this camera was selling very well and that to date, they have sold a total of 100 cameras globally in a few months, a number that was much lower than I expected.

In the end, the market is going to decide whether the EyeSpecial is the right camera for dentistry, but for the reasons mentioned above, I simply can't get excited about it.

Best Wishes,
Glenn


Sunday, May 18, 2014

OK, So I Took Dental Images. Now What Do I Do With Them?

Let's assume you're one of the thousands of dentists who've contacted me over the last 15 years while I've taught clinical photography. You've figured out which lens, camera and flash system to use. You created a photography workflow that works in your office. You've even gotten to the point where you're capturing images on a regular basis, but you've come to the realization that you need a better way to store images. Well, I'm here to help.

Maybe you're just looking for a better way to organize your personal photos. This process, with simply different naming conventions, will work beautifully.

While traveling the globe teaching my 2 day course, I used to show dentists all of the reasons why a well catalogued image archive was vital to growing case acceptance. Then, we'd walk through the entire process from creating a database all the way through presenting care using my unique Digital Co-Diagnosis system.

I'm going to share the first part with you on this post.

First, go check out my post from 2 years ago about why windows explorer (or "Finder in Apple computers) is the absolute best way to store images. https://www.blogger.com/blogger.g?blogID=1633945094564766702#editor/target=post;postID=7114437143644401070;onPublishedMenu=posts;onClosedMenu=posts;postNum=0;src=postname

Below will be a series of screen shots which will show you, step by step, how to set up a database on your computer. This series was originally created 2 years ago for Windows 7, but works almost exactly the same on all Windows machines from the last 10 years.

On future posts, I may show things like how to morph images, create effective power points, etc, if there is interest.

Please email me if you have any questions.

Best Wishes,
Glenn
Dental photography image storage

Dental photography image storage

Dental photography image storage

Dental photography image storage

Dental photography image storage

Dental photography image storage

Dental photography image storage

Dental photography image storage

KriegerContinuum.com

Kriegercontinuum.com

Kriegercontinuum.com

Kriegercontinuum.com

Kriegercontinuum.com

Kriegercontinuum.com

Kriegercontinuum.com

Kriegercontinuum.com

Kriegercontinuum.com


Saturday, May 10, 2014

The Right Lens for Dental Clinical Photography

It kills me every time a dentist writes to me something like: "I've got this great camera and lens setup that I got handed down from my brother when he got a better camera, but I can't get good images. Can you help me use it better?"  More often than not, they have a zoom lens such as an 18-200mm or 55-300mm or something like that. NONE, I repeat NONE of those lenses are appropriate for dentistry. They are not macro lenses, which means that you can never use them up close to the subject. Almost all dental photography (with the exception of portraits) uses macro photography. If you don't use a macro lens, your images will be out of focus.
This Canon 17-85mm lens is amazing to use, but the "-" between the 17 and 85 signifies it's a zoom lens and NOT appropriate for dental use.

All lenses for dentistry are macro, except Nikkor lenses (Nikon's subsidiary that makes lenses for Nikon) which call them "Micro". 

The brand you choose is important for the camera you use. For instance, if you use a Canon body, use a Canon (or Tamron or Sigma) lens. If you use Nikon, you can use a Nikkor (or Tamron or Sigma) lens.  In this post, I'm not going to get into the idea of why I'm not a big fan of using "off brands" of lenses. Buy all from the same brand, so that when something goes wrong, there's no finger pointing by one company to another. Hand it in to the repair center and let them sort it out. It's worth the extra few dollars you'll pay on the equipment.  However, here I am going to briefly discuss the type of lens you should use.


Basically, with Nikkor and Canon, there are only a few choices. For Nikkor, you can go with the 85mm or the 105mm. For Canon, you can choose the 60mm or the 100mm (the less expensive of the two 100mm lenses Canon makes is fine). The 60 mm lens is simply too tough to use in dentistry. The lower the number the closer you need to be to the subject and with a 60mm lens, for a shot of just the front teeth, you'll literally be 3 inches from the patient. Not good. The flash will never be in a position to work well. So, for Canon, you've got only one choice, the 100mm lens.
This Canon EF 100mm f/2.8 Macro USM is a great choice for Canon users. DON'T buy the more expense $1050.00 100mm Canon lens. You don't need it.
For Nikon, the 105 is an amazing lens, but at almost $1000 I simply cannot recommend it over the way smaller and way lighter  85mm lens , which costs half the price. In case you're wondering, photo quality doesn't suffer at all. I've shot both and can't tell the difference in ANY use of the image.

This AF-S DX Micro Nikkor 85mm f/3.5G ED VR is an amazing lens at a great price for Nikon users.


Shot comparison of 85 vs 105mm Nikkor Macros. I can't see a difference and for an extra $500 I don't see the value.


Don't go crazy on this subject, but also don;t fall victim to buying the wrong equipment. As I said, I have DVDs to walk you through the entire process of buying, setting up and using your camera, flash and lens for maximum effectiveness, and minimal problems found HERE.

As always, I'm here for you should you have any questions or problems.

Best Wishes,
Glenn

Tuesday, May 6, 2014

Don't Be a Shaquille O'Neal Dentist

So the NBA playoffs are in full swing and I just couldn't help watching some of the games while other life priorities were banging on my door.  Nonetheless, something occurred to me while watching the end of a few games.  A component of basketball seems to share a tremendous parallel with dentistry; Free throws.

How, might you ask, do free throws have anything to do with dentistry? Great question.

There are more than a few 7 figure athletes who have less than stellar free throw percentages. Harken back to the "Hack-a-Shaq" days when teams would slow down the legendary Shaquille O'neal by making him shoot free throws, which he was notoriously bad at shooting. A lifetime .527 free throw percentage means that this man, who made 15 all star teams, and  was only one of 3 players ever to win an NBA MVP, All-Star game MVP and Finals MVP in the same year, was almost as likely to miss a free throw as he was to make it. How could anyone possibly be considered a complete player when one can't consistently make the only uncontested shot in basketball from only 15 feet away? Alas, there are many who don't consider Shaquille O'neal a complete player for just this reason even though he's a shoe-in for the Hall of Fame.

But I digress. Back to dentistry...

How many dentists work their tails off training to prep the best crowns or place implants perfectly, or travel to 3 day courses for $6000, or hone their smile analysis techniques or practice management ideas and NEVER take their clinical photography seriously. I'm referring to the overwhelming majority of dentists who, like Shaq, view a part of their profession as something they will simply accept as being inferior to the rest of their skill?

I am beseiged with daily questions from dentists with "cosmetic" "implant" "esthetic" (and a whole other array of adjectives ) practices.  I've gone to their websites which scream their accolades and how much better they are than the rest of the dentists out there. Yet, these same dentists ask me simple questions about clinical photography (no shame there) but when I offer suggestions that require just a modicum of work, they say that images aren't that important to them. How can anyone be incredibly proud of their dentistry and not be willing to take literally a few hours to practice their photographic skill? Not only will it let you learn more about your dentistry by doing retrospective analyses of your work, but properly used, can help your practice grow immensely.

How many times have you sat in lectures of world renown lecturers only to see a photographic misrepresentation of the occlusal plane or Angle's classification. Somehow we look past these very real problems in records to ogle the beautiful porcelain or gorgeous soft tissue. I'm not saying that porcelain or soft tissue don't matter. On the contrary, they are the things that help us strive to become better clinicians. However, how many clinicians, who are WAY better than I will ever be, refuse to use an SLR because it's "too heavy" or their staff doesn't want to use it. Or perhaps they're willing to learn intricate grafting procedures but don't want to take 15 minutes to learn how to use simple histograms, the key to consistent lighting and great depth of field.

In the end, you WILL be judged on the quality of your images. Don't you want to be viewed as a "complete" clinician? Or, would you rather shoot 50% on the easiest of clinical procedures to master?

It's really your choice and best of all, you're not alone. I'm happy to help in any way possible. Just ask.

Best Wishes,
Glenn

Friday, April 11, 2014

A Unique Way to Increase Case Acceptance

Sorry all. I've been a little busy the last few months, but I felt that I just had to post another entry related to case acceptance, and of course, clinical photography.

Back in the day, before digital technology, we had to present images to patients using actual paper photos, slide projectors or for those who were really sophisticated, a Caramate. We had to send the film out to be developed, turned into photos from slides and had no ability to mock up anything, short of acetate or masking tape and a black sharpie. Yet somehow, we got patients to say "yes" to the treatment plans we presented.  The success that many of us had without technology illustrates that one doesn't need fancy technology to "sell" treatment.
This is a Caramate-basically a TV with a built in slide projector that presented the image on the screen below. Yet, we got case acceptance.
By the way, I have absolutely no problem discussing the dirty word "sell" related to care. If you perform great dentistry and want people to pay you to do it,  congratulations, you're in the selling business. Unfortunately, selling has been given a bad name.  Personally, I have no problem with it as long as I'm honest, non-paternalistic and give patients all options. That said, there's a way to get people to say "yes" as opposed to the "I'll call you tomorrow" response heard too often.  It's called "Digital Co-Diagnosis".

About 15 years ago, I attended my first digital case presentation course. It was interesting to learn the technical side of things, but I was blown away with how reliant the teacher was on technology. It was all bells and whistles,  techniques on getting the "show" to look real nice and shine like a diamond. That's OK, but at some point you need to have some real substance, lest you treat the patient to a multimedia show with no "close" for case acceptance.  The role of images was so unimportant in the process that in the middle of the course I was asked (as a paid attendee) to teach clinical photography to the rest of my course mates. The teacher, who holds prominent positions in the world of digital technology was unable to help them. It was at that moment that I realized that digital technology alone cannot replace the value of a great picture.

So, I went home to Seattle and started tinkering with the process of digital case presentation. After months of experimentation, I stumbled across a process that made all the difference. I came up with a process to let patients diagnose the case themselves, without bells and whistles, without having to do much but present my best care.

The first week I used this process, I had two large cases say "yes" for $50,000's worth of dentistry. Aside from telling you about the technique, the only place I can help you is with the core component of the process; exceptional images. You see, today I still see the major problem of dentists relying on the "show" to sell the case rather than letting the patient "own" their problem. Once they own it, you'll never need to hear them ask you "so why are we doing this treatment?" when you're about to anesthetize them for their scheduled appointment.  Patients will fight a whole lot less about a bill when they own their problem. Wouldn't it be great to have a tagline (private, of course):"At Main St. dental, it's YOUR problem, but we'll help you solve it." It really is that great when patients own it. So, how do we get them to own it? Great images.

Instead of showing a filling and telling the patient how you can fix it (you owning the problem), how about walking the patient through the process of self discovery instead? Show them the image and then ask "So what do you notice about the teeth?". If they don't see it, ask them about the molar. They may say something like "It looks a little chipped" or "the edge looks rough". That's a great opening, so instead of saying "yes it is, we should crown it", perhaps you ask another question like "Why do you think that's the case?". You get the idea, right? Walk the patient down the path towards self discovery like a prosecutor making a case to the jury. When the patient says "Is that decay?" or "That filling looks really old" they own the problem. They can understand it and realize that it's their problem. Again, you need exceptional, not just good images to make it happen.

If you have amazing up close images (for heaven's sake please don't tell me you're using a wand camera) your patients will be able to see this stuff from a mile away. Your case acceptance should go through the ceiling. Instantly. When I used to teach this at my courses,  I'd get letters from dentist telling me that they were doing $100,000 more a year since implementing this idea. It's not new or reinvented. It simply uses older, proven case presentation techniques with exceptional clinical photography at the center.

If you want your images to stand out in your community and for your case acceptance to jump, consider purchasing our DVD's, mirrors and retractors which are unlike anything else in dentistry. The quality of the images will be just what you need to help see a surge in your case acceptance. They're available HERE.

I'd love to help in any way possible. Aside from your wand camera (useful for many other applications other than digital case presentation, which I will discuss another time) just pick up whatever you have, learn my techniques for using mirrors and retractors and go get 'em.

I'm always here if you need anything.

Best Wishes,
Glenn


Tuesday, December 31, 2013

What Will Some Dentists Do When Point & Shoots Are Extinct?

Well, we’re just hours away from the end of 2013 and we can all agree that it was a pretty interesting year.  In looking back on the year, certain trends were interesting. Like people getting rid of land line home telephones or ditching cable in favor of online streaming. However, there’s one statistic that I saw which may one day play a role in dentistry; the sale rate of "point and shoot" cameras.

AnnaMaria Andriotis, writing for MarketWatch reports that:

"Their small size and sleek look made digital “point and shoot” cameras all the rage for years. Now, demand is sunsetting. Roughly 11.5 million are estimated to have sold this year in the U.S., down 44% from 2012, according to the Consumer Electronics Association, which represents consumer technology companies. Sales are expected to drop to just under 8 million next year.The cameras are suffering from an identity crisis. Consumers who want high-quality photos are opting for the larger, DSLR (digital single-lens reflex) cameras. Others prefer to stick with just one gadget — their smartphone — which takes pictures.And there’s new competition from cameras intended for the outdoor thrill-seeker, like the GoPro, for people who want photos capturing action (the camera attaches to your body while white water rafting or scuba diving, for instance) rather than stopping to pose for a pic.”
Down 44% from 2012 to 2013 and down another projected 30% in 2014 is an astounding fact.  That indicates a pretty significant trend.
Virtually every dentist who uses a point and shoot camera for dentistry is simply converting an existing point and shoot camera for dental use. I am aware of no specific camera designed for dentistry alone.
If, as Ms. Andriotis writes, point and shoot camera use is declining as precipitously as the statistics would suggest, will there come a day where point and shoot cameras become extinct? If so, what will be the impact on dentistry?
I’m not saying that there’s an imminent problem looming, but it is interesting how societal trends towards electronics could potentially have an impact in dentistry.
Wishing you all an amazing and prosperous 2014!
Glenn

Saturday, December 14, 2013

An Amazingly Simple Trick To Properly Use The Nikon Macro R1 Flash

So, if you’ve read a lot of my posts on how to purchase a camera and flash, you’ve probably seen that of all the flash systems out there, the one that stands out to me as the easiest and best is the Nikon R1. Now, you may also have seen me write that if you really want to use it with another camera, you can buy the Nikon R1C1 and use the commander module.

If you’ve bought my DVD on learning how to buy and set up a camera system for dentistry (available HERE), one of the only things not on there are the intricacies of how to actually set up the flash systems. Well, in this post, I am going to cover setting up the R1, and in a future post I will cover the Canon MR-14EX.

So, the R1 comes as a myriad of items, but the only ones you really need to be concerned with are the  SX-1 Attachment ring and the (2) SB-R200 speedlights.  Forget everything else. Seriously. Yes, I know you’re probably a dentist and stuck on all the goodies that came with the R1, but forget them. Fight the urge to feel that they are necessary. I have been shooting gorgeous images without everything but the ring adapter that fits your lens. Also, remove the clear lens cover from your speedlight. You won’t need that either.

So, here’s what you’re left with when it’s properly set up (remember, you must have the on board flash popped up for the SB-R200s to function):
R1 flash
R1 Flash with Nikon Camera. NOTE: Only 3 items from the R1 kit are actually used: The SB-R200 speedlights, the  SX-1 attachment for the speedlights and the proper adapter to attach the SC-1 to the threads on your lens.


So, let’s set up the camera first. We need to send a signal from the camera to the flash for it to work. Remember, your camera must support the R1 through a commander mode on your camera’s setup. If it does not (i.e.-the D3100 or D5100) I apologize, but you bought too little camera for dental photography. You CAN convert cameras to work with the R1 but you ned to buy the SU-800 commander module, a $250 upgrade which would have been better spent buy simply spending $250 on a better Nikon which has commander module built in. If you made that mistake, don’t beat yourself up. It’s very common.  You just need to figure out if you want to add the $250 attachment or buy a different camera. It’s up to you, but I’d buy a better camera so that things would not be so bulky and the picture quality will be better.So, let’s go into the menu on the back of the camera and navigate through to the final picture by following the yellow highlighted options. Almost all Nikons have this feature. They may look slightly different as you navigate, but they are very similar. Here’s a great image from Nikonians.com:
Most Nikons have similar menu options, so getting to the “Built-in Flash Mode” should be pretty easy to find.


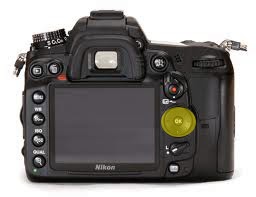
You simply need to get to that final  “Built-in Flash Mode” menu screen and we’re almost there.So, once you see that screen, you simply need to use the toggle button (shown in yellow below) 

on the back of your Nikon to toggle between the “Mode” and “Comp.” columns and to make the following settings:
Set the Built in to “--“ which means you’ll be turing off the built in flash. Remember, you still need to pop it up for the speedlights to work because it will emit a brief “pre-flash”.
Set the “Group A” to Mode “M” and Comp. “1/1”-this will be full power
Set the “Group B” to Mode “M” and Comp. “1/4”-this will be 1/4 power
Set the “Channel” to “1” 
Save your settings.

Now, look at the top of your SB-R200 speedlight. It should look like this:


Remember that you set the channel to 1? Well, ALWAYS make sure that your channel here is set to”1" or the camera and flash will not communicate. If your flash ever doesn’t properly fire in the future, look at that first (after making sure you’re on-board flash is up).

Remember that you set the “Group A” to 1/1 and the “Group B” to 1/4? That’s because whenever you want to shoot a full face image and need full flash, simply set it to “A” on the flash (on both speedlights). When you shoot intra-orally, you want a considerably diminished flash power, so simply set both to “B”. It is truly that simple. To toggle between intra and extra oral images, you simply need to turn a switch from “A” to “B”. Yep, that’s it. Well, not really.  

Of course, you need to know how to handle f-stops and lighting for properly lit images as well as great depth of field and you also need to know how to handle mirrors and retractors for proper composition but those are covered in great detail in my DVDs found HERE.

I hope this helped and as always, please hit me with any questions.

Best Wishes,
Glenn