Well, I'm just a GP (about to start an ortho residency for 30 months), so who am I to talk about lab shots? Well, as someone who teaches clinical photography around the world, it's my job to look into every aspect of the subject. I've been using a great product for about 7 years and I'm happy to share it.
 |
| We can now make lab images look way better than this traditional image |
When you want to show images of casts or lab work, how do you shoot them? There are lots of ways to capture an image, and there's a progression that most people go through.
Maybe you simply put the object on the counter with a nice formica background. Not very pretty or fancy, but the job gets done. Perhaps you go so far as to put a nice bib underneath it instead. Not my favorite, but at least the funky formica design doesn't distract those viewing the image. If you start to get "fancy" perhaps you decided to put down a piece of black velvet and you may have even gone one step farther and shot an image of the lab work on a mirror like one of those big shot lecturers.
Well, if you're looking to get great lab images and I mean GREAT, you have to consider using the Digital Lighthouse found at Photekusa.com. Yes, it means having one more step, but when you see the difference it makes, you'll understand why you used it. They come in a variety of sizes, and even the largest is only $149.
 |
| The digital lighthouse helps give stunning lab images, especially if the object being photographed is metallic or translucent. |
The concept is simple. Like a standard soft box used in portrait photography (see image below) using the digital lighthouse removes all glare from flashes.
 |
| The digital lighthouse works a lot like this standard soft box by removing glare and shadows and giving a much softer look to the object being photographed. |
The only pre-requisite is that your flash must be positioned outside of the white nylon box so that it can be softened. This is where I really love the Nikon R1 (or R1C1) because the two small sb-200 units can be taken off the camera and held outside of the box. If you shoot a Canon 14EX (or Sigma equivalent) you're only going to get light from one direction rather than two and you may consider another flash system for lab work. Photek sells two nice lamps that could take the place of the flashes altogether and you could have the whole setup ready to go at all times.
 |
| If you want to skip using flashes altogether, consider buying Photek's lamps. |
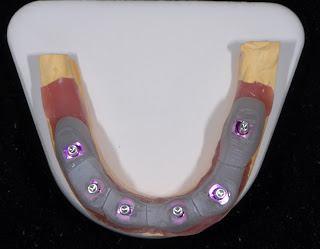
In another blog post I'll show you exactly how to shoot an image using the flash option. The whole purpose of this post is to show you another way of looking at things. For instance, take a look at the following image taken with a regular flash setup without the digital lighthouse. It was taken a number of years ago and to make it fancier at the time, I used a piece of black velvet background.
Notice the shadows all around the outside of the cast and more importantly, look at the glare coming off the metal pieces of the implant parts. Yes, the image is "acceptable" but we can do much, much better.
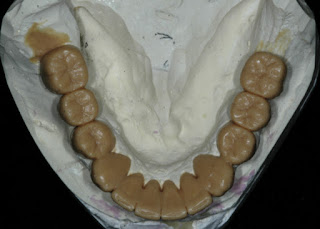
Look at the image of the wax up below. Yes, it is well lit and composed properly and it even has a nice velvet background, but it just doesn't "pop".
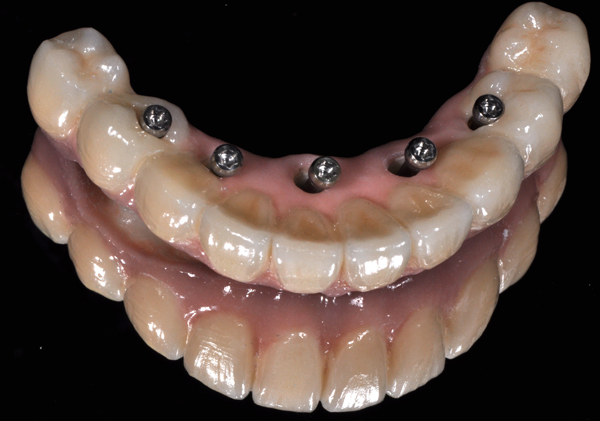
Now, look at the following image of a soft tissue cast. With the addition of a nice Photoshop colored background (I always try to disclose non-global changes) you have what I think is an image that is way better.
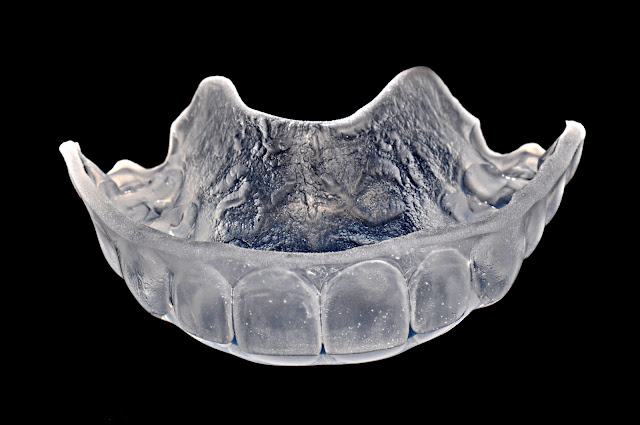
Or, take a look at this whitening whitening tray. It's really, really tough to shoot anything translucent because of glare and difficulty getting good depth. The lighthouse tackles that with ease.
 |
| Using the lighthouse and photoshop for some dust removal on the black background and a very tough to shoot translucent object turns out pretty nice. |
OK, this last image wasn't taken in a lighthouse. It was actually taken on a mirror using the R2 bracket and pocket bouncers, but that's for another blog... ;)
Remember, if you want to get amazing intraoral images, consider ordering my "Exceptional Dental Images Made Easy DVD" or my custom designed mirrors and retractors by clicking HERE.
Also, if you have any questions or want to see me tackle a particular topic, just click HERE and send me an e-mail through my website.
Best Wishes,
Glenn


Thanks for great information you write it very clean. I am very lucky to get this tips from you.
ReplyDeleteDental Implants New Haven CT